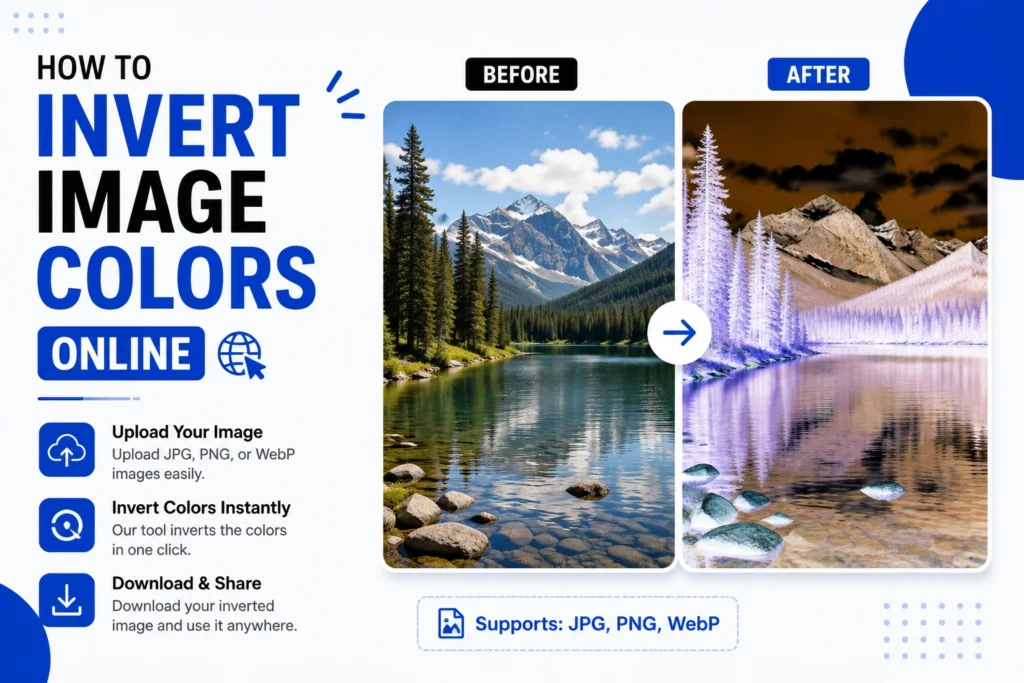
Every pixel in your photo has an exact opposite color. Swap them all and you get a photographic negative, the same effect film cameras produce when light hits undeveloped film. To invert image colors you used to need Photoshop, but you can do it free in your browser in under 10 seconds with the Pixellize invert image tool. This guide covers how to do it online, why the effect looks the way it does, and when to use per-channel inversion instead of a full flip.
Think of inverting as “finding the complement.” If your sky is a warm sky-blue at RGB(135, 206, 235), its inverted version lands at RGB(120, 49, 20), which is a deep burnt orange. That relationship is why a negative looks so eerie and recognizable at the same time.
What does inverting image colors actually do?
Inverting image colors flips every pixel to its mathematical opposite on the 0-255 RGB scale. For each pixel, the new value is calculated as 255 minus the original. A pixel with red=220 becomes red=35, green=50 becomes green=205, and blue=50 becomes blue=205. The resulting image looks like the negative of a film photo, which is exactly where the term comes from.
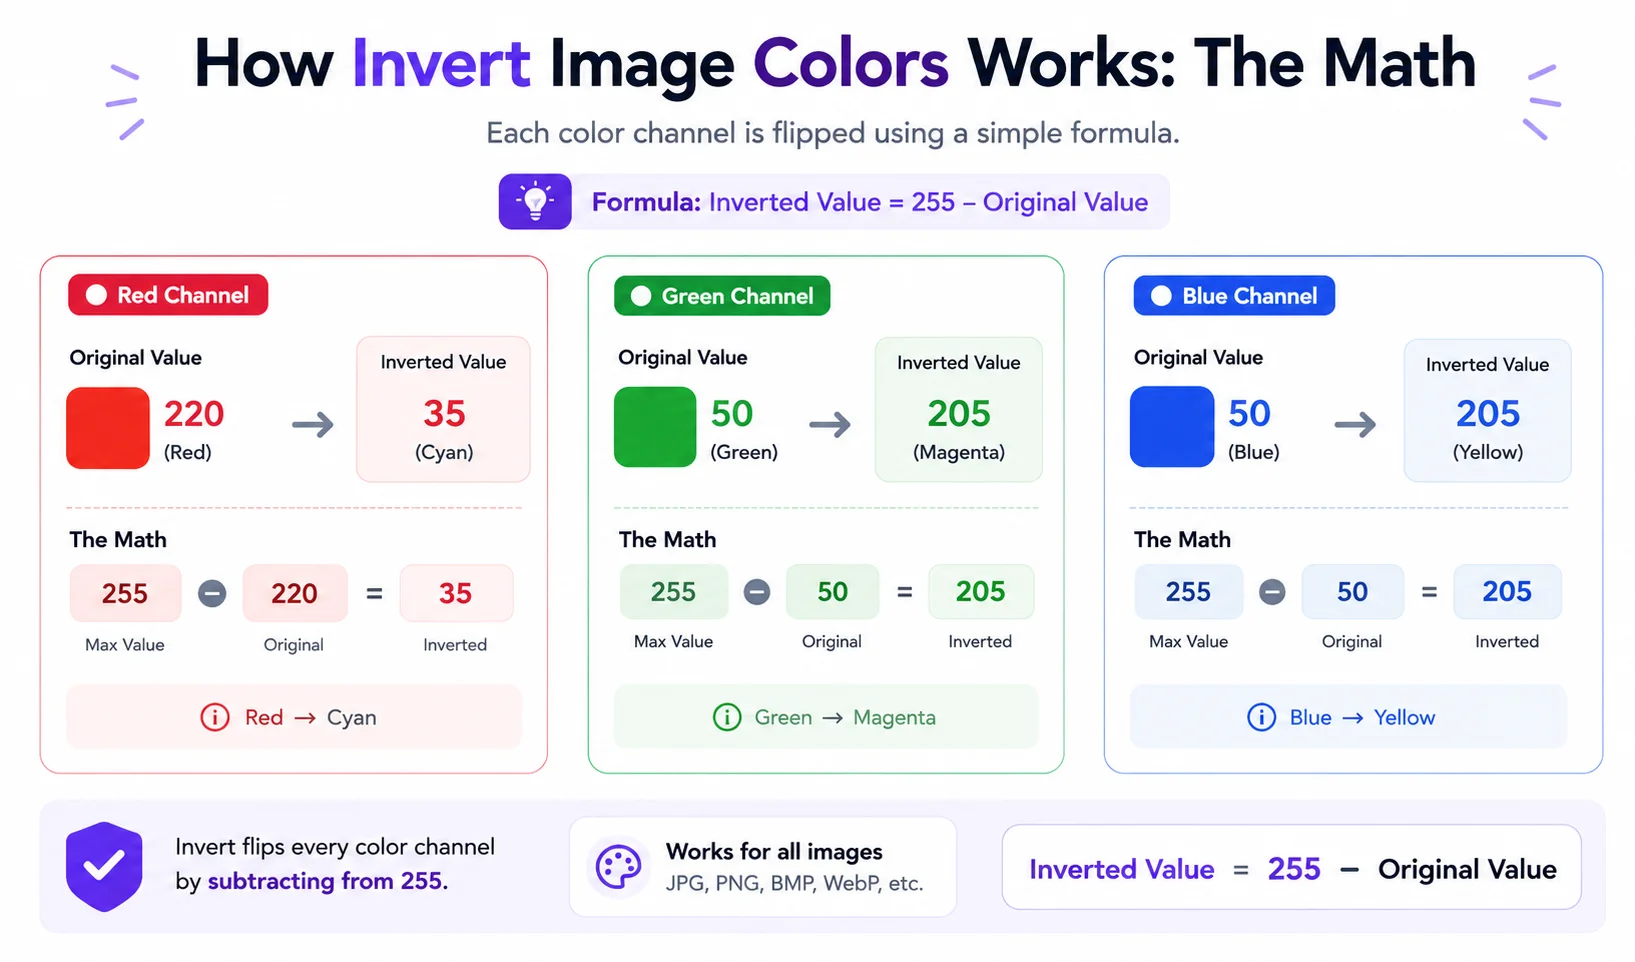
There’s no compression, no quality loss, and no interpolation. The math is exact and reversible, so inverting the inverted image always returns the original. That property is what makes the effect useful in printing and dark-mode workflows, where you need to predict the output precisely.
How to invert image colors online: step by step
Using the Pixellize invert image tool takes three steps. Upload the photo, pick your inversion settings, then download the result as a PNG.
- Upload your photo. Open the tool and click Choose Image or drag the file onto the drop zone. JPG, PNG, and WebP all work. The photo loads directly into your browser; nothing is sent to a server.
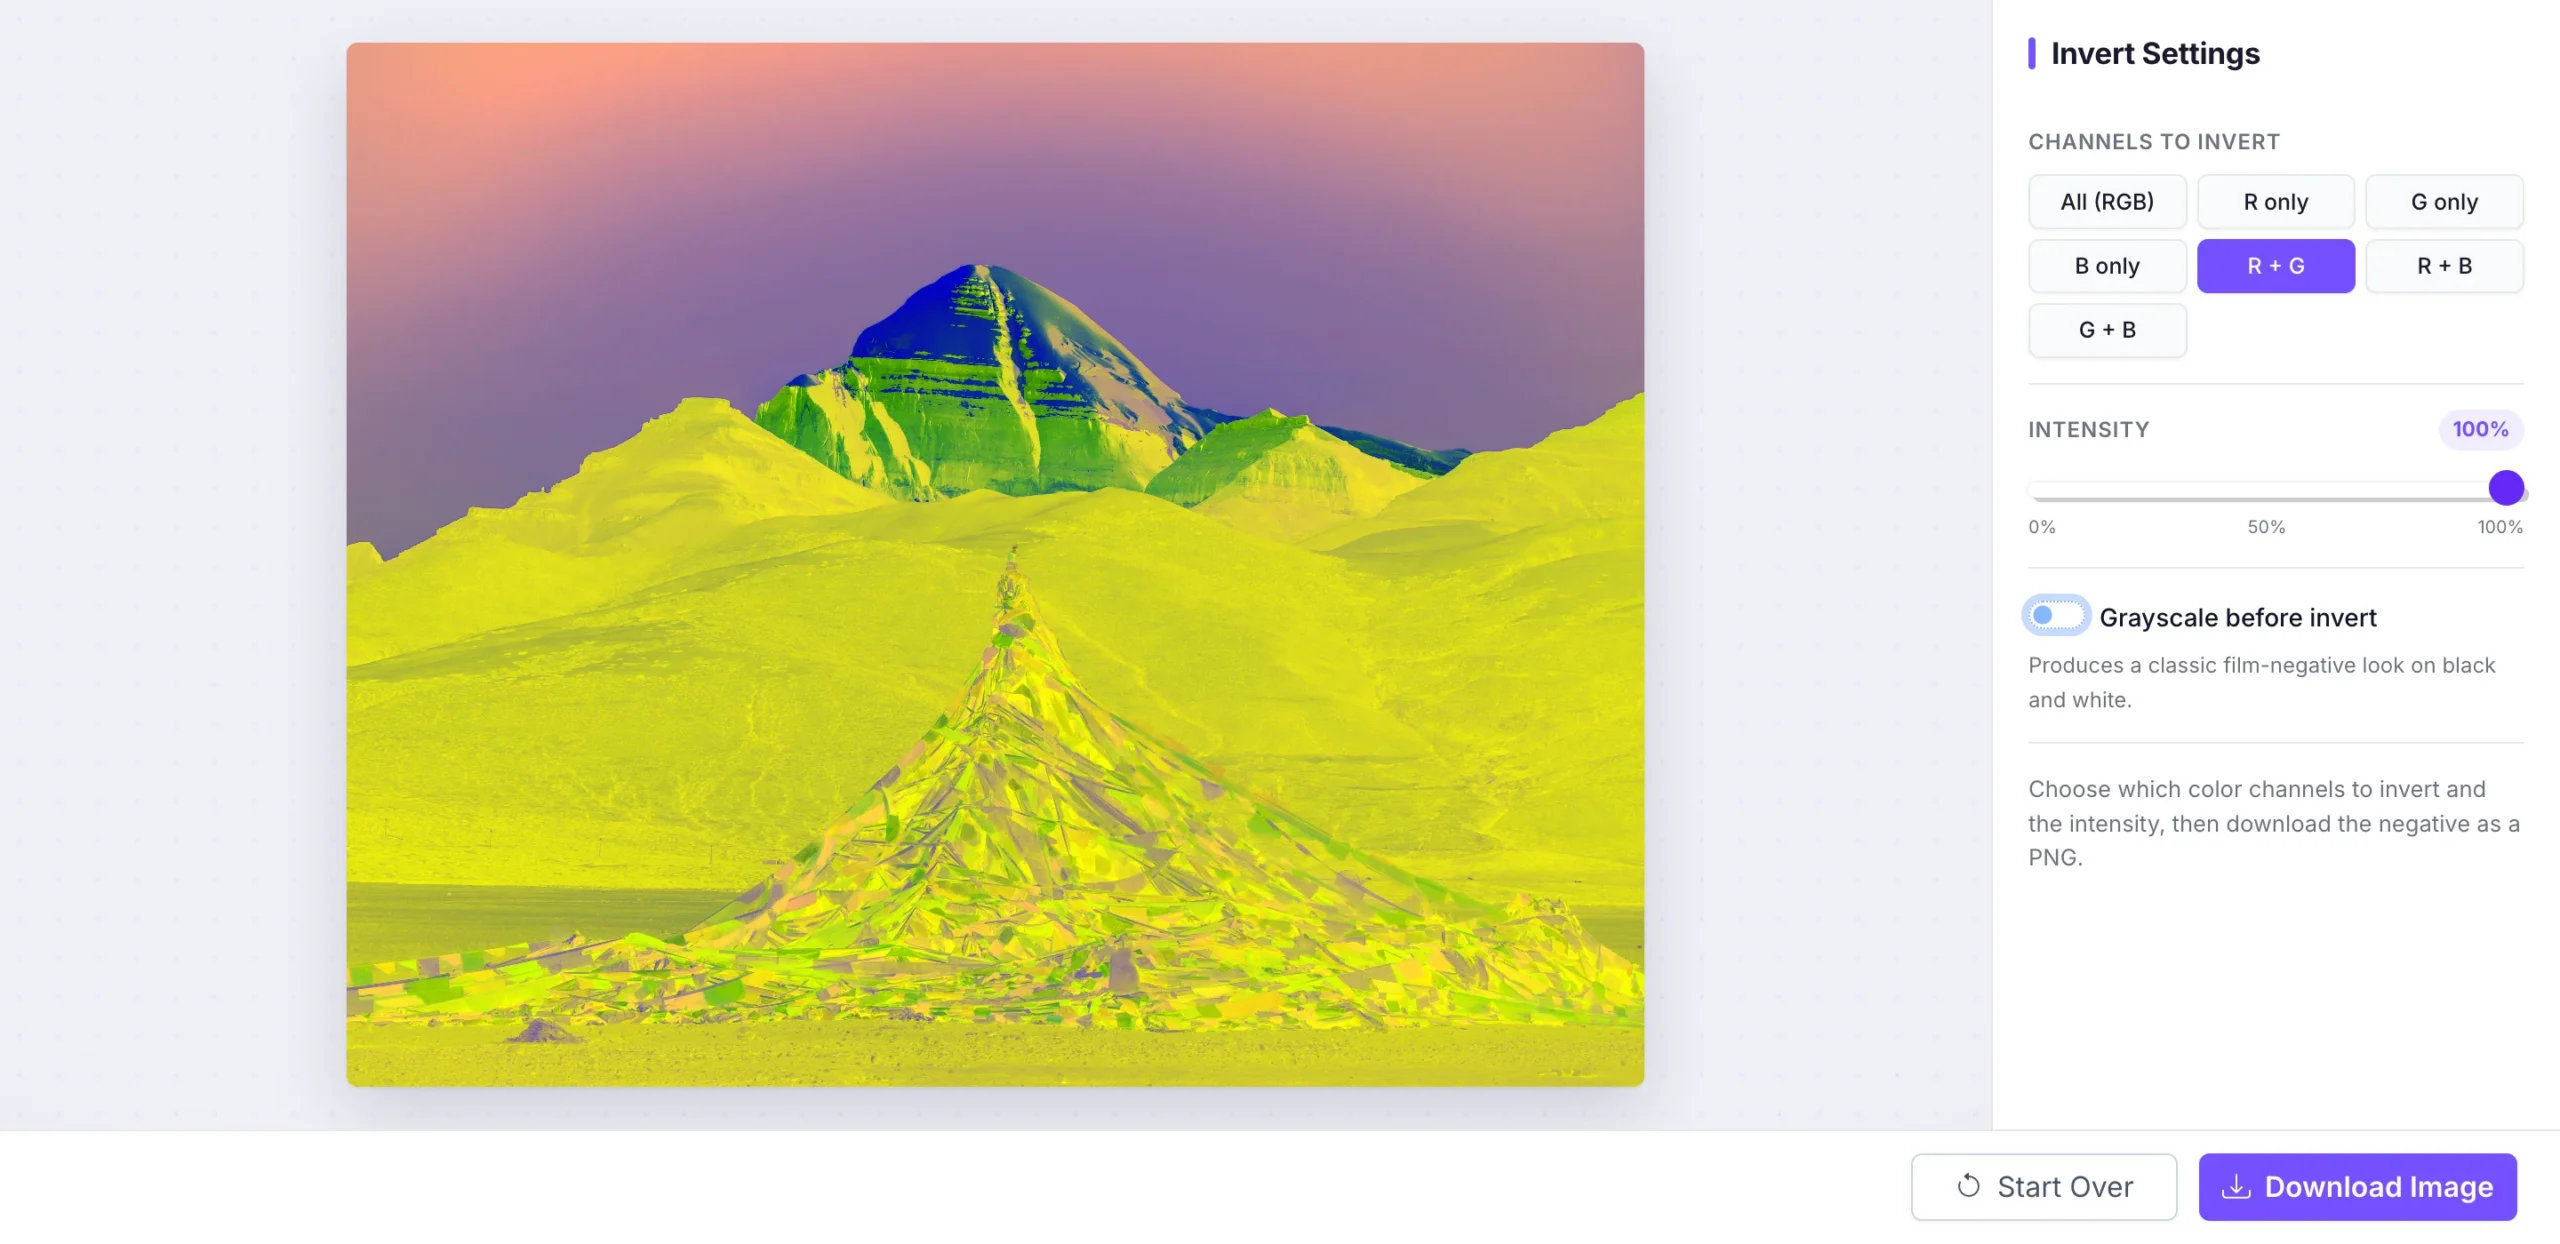
- Choose your channels. The default “All (RGB)” inverts everything for a full negative. If you want a specific color effect, pick R only, G only, B only, or a pair like R+G. Each combination produces a different split-tone look.
- Adjust intensity if needed. The slider blends the inversion from 0% (no change) to 100% (full flip). Dropping it to 50% creates a faded, washed-out look that works well for overlay textures.
- Download. Click Download Image and a clean PNG saves to your device. Pixellize adds no watermarks.
Five ways to invert image colors compared
Every method produces the same mathematical result, but they differ on speed, cost, and what device they run on. Here’s a quick comparison of the five most common approaches.
| Method | Install? | Free? | Works on phone? | Per-channel control? | Intensity slider? |
|---|---|---|---|---|---|
| Pixellize (browser) | No | Yes | Yes | Yes (7 modes) | Yes |
| Photoshop (Image > Invert) | Yes | No | Limited | Via Curves/Channels | Via Opacity |
| GIMP (Colors > Invert) | Yes | Yes | No | Via Curves | Via Layer Opacity |
| MS Paint (Select All > Invert) | No (Windows built-in) | Yes | No | No | No |
| Canva | No | Limited (paid plan) | Yes | No | Limited |
How to invert image colors in Photoshop
Photoshop’s Image > Adjustments > Invert command (Ctrl+I on Windows, Cmd+I on Mac) inverts every channel at once. It is non-destructive when applied as an Adjustment Layer, which means the original pixel data is never changed and you can toggle the effect off at any time. The keyboard shortcut is one of the fastest ways to invert in any desktop app.
- Open the photo in Photoshop (File > Open).
- To keep the original intact, go to Layer > New Adjustment Layer > Invert. This adds an invert layer above your photo.
- Press Ctrl+I (or Cmd+I on Mac) as a quick shortcut on a duplicate layer if you want a flat result.
- Export the file via File > Export > Export As and choose JPG or PNG.
This caught me off guard the first time: if you apply the Invert command directly to the Background layer, it is destructive and cannot be undone after saving. Always use an Adjustment Layer or duplicate the layer first.
How to invert colors in MS Paint (Windows)
MS Paint has a built-in invert command that works on Windows 10 and 11 with no extra install. It is the fastest zero-setup option on a Windows machine when you don’t have a browser handy.
- Open the image in Paint (right-click the file > Open with > Paint).
- Press Ctrl+A to select the entire canvas.
- Right-click the selection and choose Invert Color, or go to the Home tab > Image group > Invert colors button.
- Save the result with Ctrl+S or File > Save As.
Keep in mind Paint has no layer system and no undo after saving, so work on a copy of the file.
What is per-channel color inversion?
Per-channel inversion flips only one or two of the three RGB channels instead of all three at once. Inverting only the red channel turns reds into cyans while blues and greens stay roughly normal. Inverting red and green together produces a vivid blue-shifted palette. These effects are commonly used in music video color grading, retro poster design, and social media visual effects.
Pixellize supports all 7 combinations: R, G, B, R+G, R+B, G+B, and full RGB. Here’s what each produces in plain terms.
- R only: Reds shift to cyans. Blues and yellows pick up a warm cast. Good for a retro duotone look.
- G only: Greens shift to magentas. Natural landscapes turn alien pink-purple.
- B only: Blues shift to yellows. Sky turns amber, skin tones stay roughly normal.
- R+G: Everything shifts toward blue/violet. Popular in synthwave and neon aesthetics.
- R+B: Greens and yellows dominate. Creates an acid-green, infrared-style image.
- G+B: Reds and oranges dominate. Skin tones turn orange, skies go red.
- All (RGB): Full photographic negative. Every color inverted equally.
To try these, open the Pixellize color inverter and use the channel buttons in the sidebar. The live preview updates as you switch, so you see the result before committing.
When should you invert image colors?
Inverting colors has at least 5 practical uses beyond artistic effects. Film digitization, dark-mode design, print proofing, accessibility testing, and creative compositing all rely on color inversion. The operation is the same in every case: subtract each channel value from 255 and rebuild the image.
- Film negative digitization. Scanned film negatives look inverted compared to the final print. Running them through an invert step is part of the basic digitization workflow.
- Dark mode asset creation. UI designers invert icons and illustrations to see how they read on dark backgrounds, then adjust the inverted version to clean up any hue shifts.
- Print proofing. Some screen-to-print workflows require a color negative to account for how the ink or dye sits on the substrate.
- Accessibility testing. Inverting a UI screenshot reveals contrast ratios that are not visible in the normal view, helping identify text that fails WCAG contrast minimums.
- Creative effects. Photographic negatives, duotone grids, and glitch-art collages all start with an inverted layer. According to Adobe’s Photoshop documentation, the Invert adjustment is one of the most-used tonal operations in compositing workflows.
Invert image colors on iPhone and Android
The Pixellize invert image tool works in Chrome and Safari on both Android and iPhone, no app download needed. Open the page, tap Choose Image, pick a photo from your camera roll, adjust channels and intensity in the sidebar, and tap Download Image. The PNG saves to your phone’s downloads folder or camera roll, depending on your browser settings.
iOS also has a system-level accessibility setting under Settings > Accessibility > Display and Text Size > Smart Invert, but that inverts the entire screen display for legibility, not individual photos. It does not save an inverted image file.
Invert image colors online, for free, right now
You do not need Photoshop, GIMP, or any installed software to invert image colors. The Pixellize tool handles it in seconds inside a browser tab, with full per-channel control, a live preview, and a clean PNG download. It works on desktop, phone, and tablet, and the image never leaves your device.
Open the free Pixellize invert image tool, drop in your photo, and pick the inversion mode that matches your project. Full negative, single-channel duotone, or a partial blend at 40% intensity, it takes under a minute to try them all.
Frequently Asked Questions
What does inverting image colors do?
How do I invert image colors online for free?
What is the keyboard shortcut to invert colors in Photoshop?
What is per-channel color inversion?
Does inverting colors reduce image quality?
How do I invert colors on iPhone?