
How to Find All Pages on a Website: 7 Proven Methods
You inherit a site with a few hundred pages and no documentation. Where do you even start? Learning how to find all…
Read articleFind broken images on a website in minutes: scan any site with a free checker, catch every 404 image with its status code, and fix the worst first.

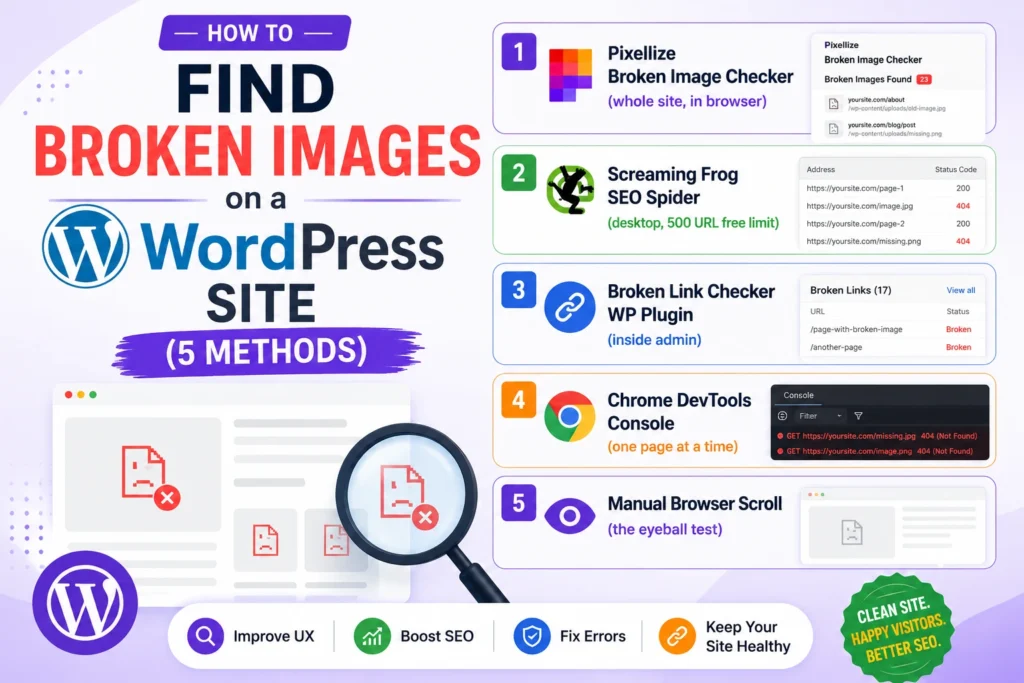
A broken image is one of those faults you stop seeing on your own site. The gray placeholder box, the missing product photo, the 404’d hero at the top of a post: visitors notice it in a second, and so does Google’s crawler. The quickest way to find broken images on a website is to scan it from the outside with a broken image checker, the same way a search engine sees your pages. This guide covers how to find broken images on a website, on any platform and on WordPress specifically, the real causes behind each 404, and how to fix them without guesswork.
To find broken images on a website, run a hosted broken image checker: paste the URL, pick single page or whole site, and it crawls the HTML, collects every image reference, then HEAD-checks each one and lists every 404 with its status code and source page. It takes seconds for a single page and needs no login or install.
This approach works the same on a Shopify store, a static HTML site, a Webflow page, or a WordPress blog, because it reads the delivered markup rather than the platform behind it. The Pixellize broken image checker runs the whole scan server side, so it is not limited by what your browser happens to render. Here is the exact flow:
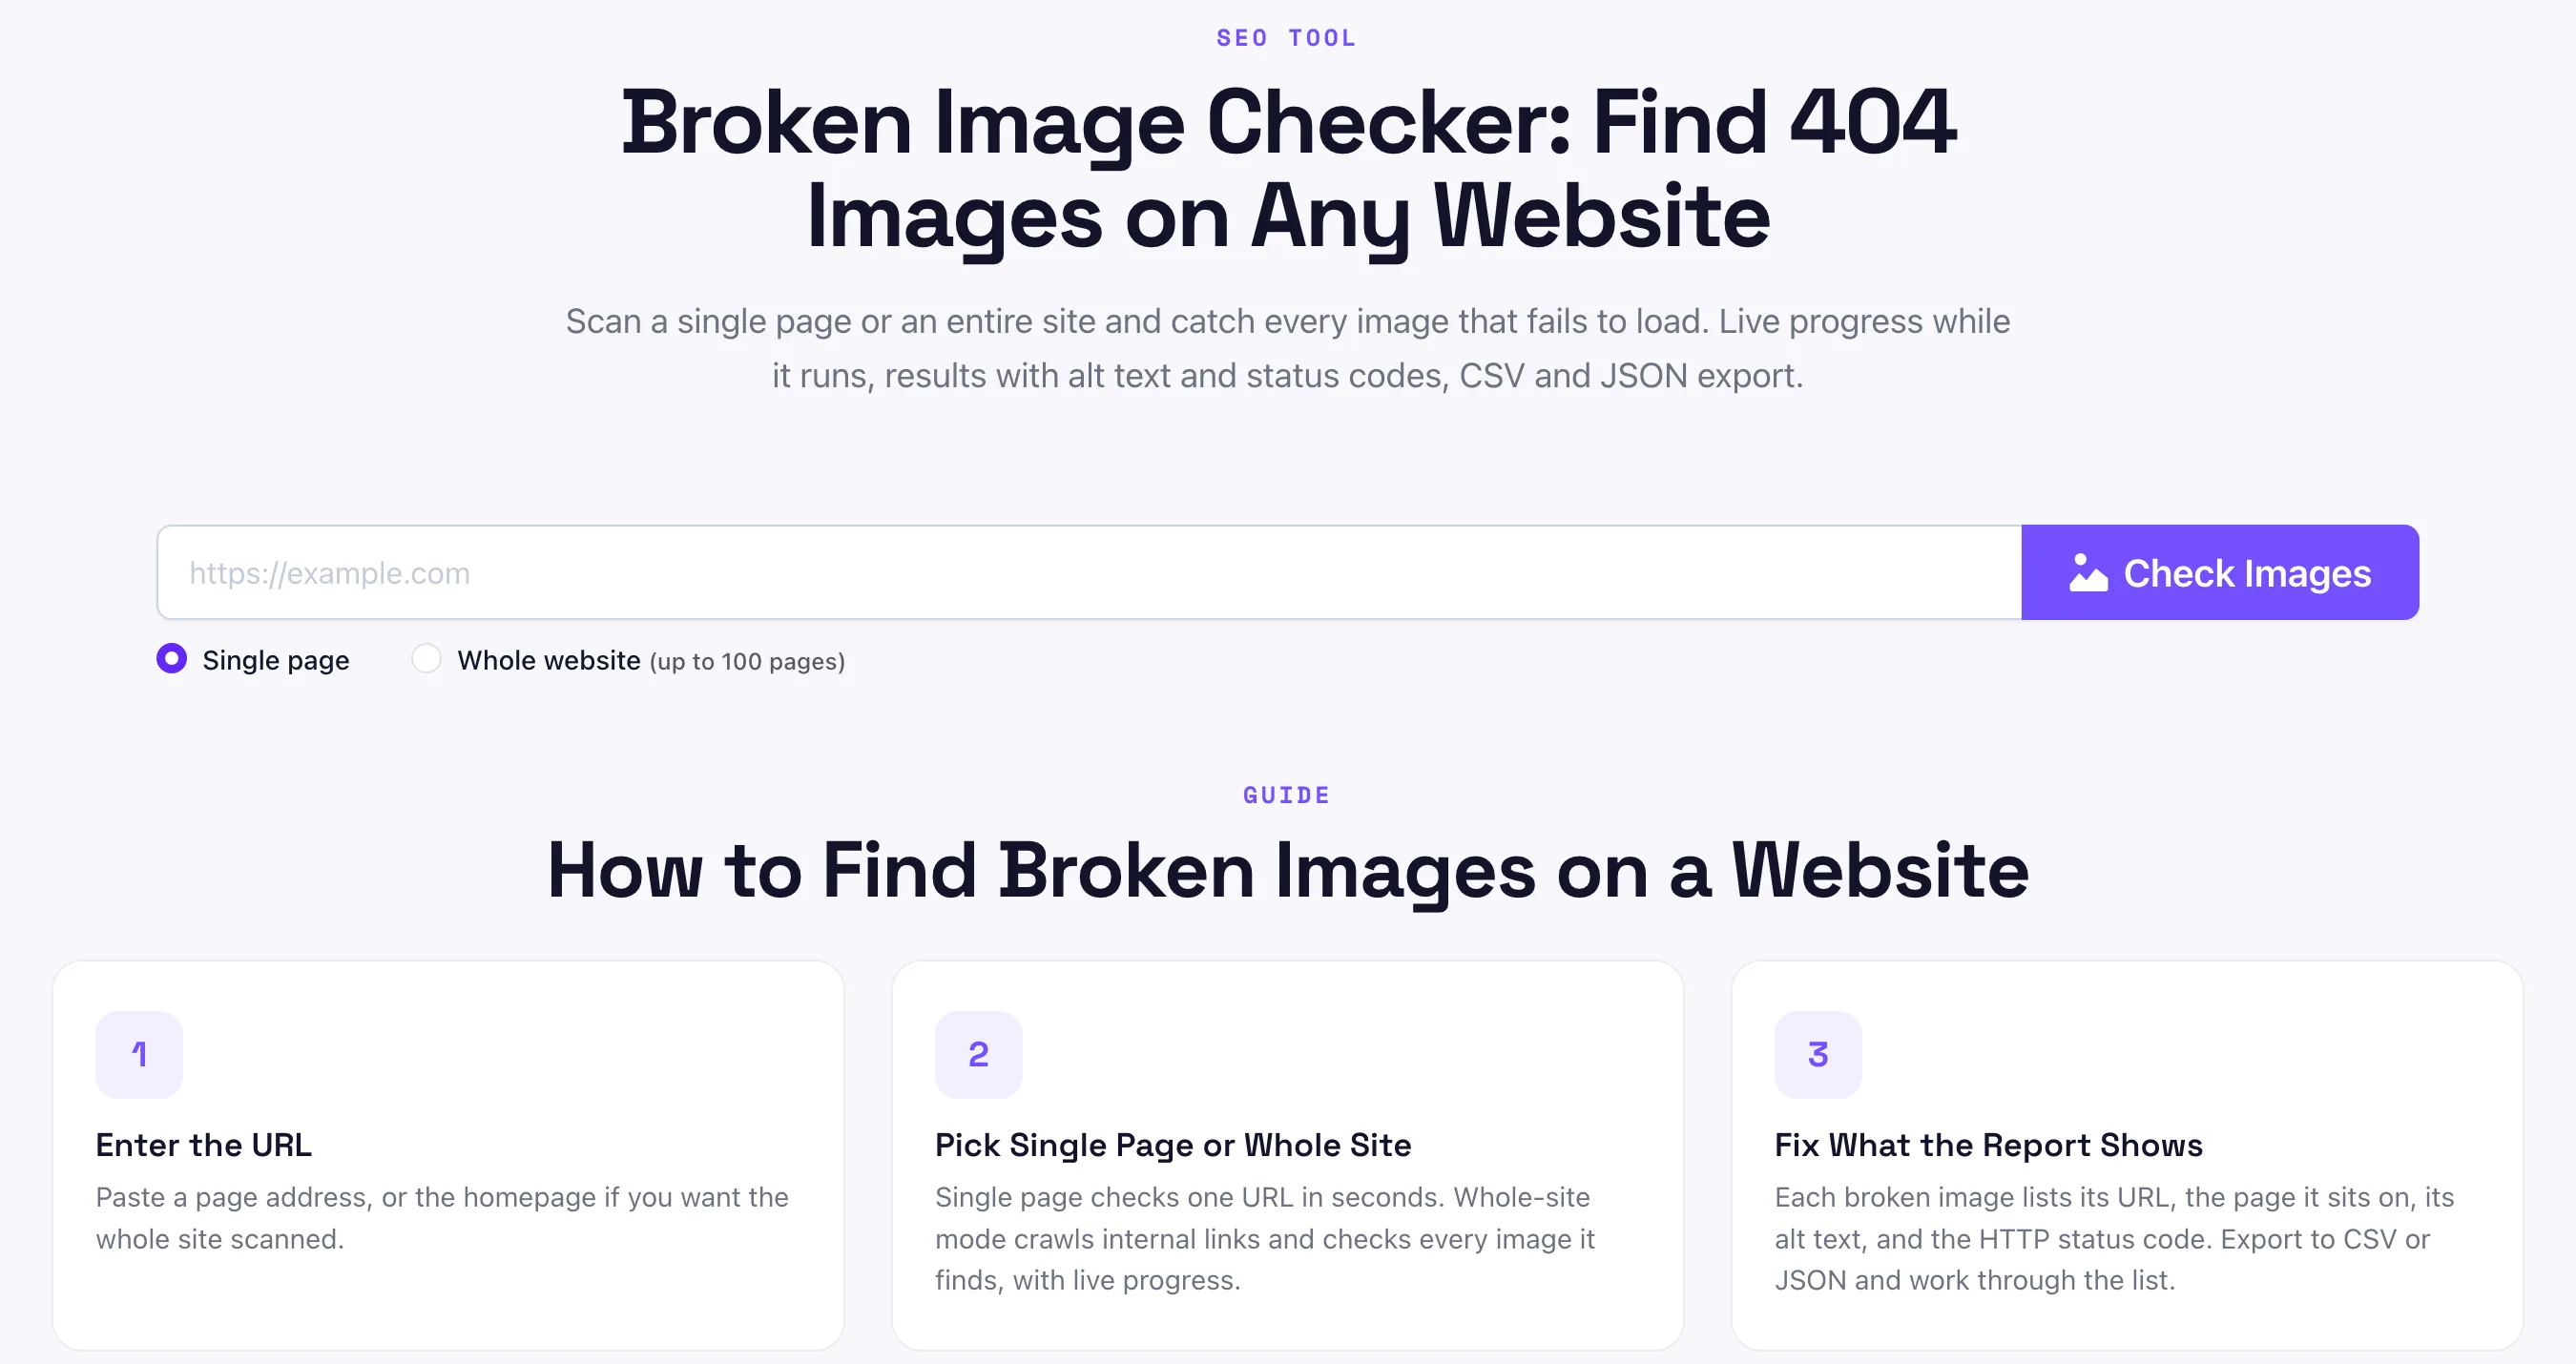
The first time I ran this on a client site, a single whole-site scan surfaced 38 broken images that had sat unnoticed for months, most of them hotlinked from a partner domain that had quietly gone offline. A browser would never have told me, because I was not visiting those old posts.
The method depends on scale. For a quick check of one page or a whole site up to 100 pages, a hosted broken image checker is the fastest route and works on any platform. For sites over a few hundred pages or with strict crawl rules, a desktop crawler earns its place. The table below ranks the realistic options.
| Method | Scope | Works on any site | Best for |
|---|---|---|---|
| Pixellize broken image checker | Single page or whole site (up to 100 pages) | Yes | Fast first sweep, CSV export, no install |
| Screaming Frog SEO Spider | Up to 500 URLs free | Yes | Medium sites, crawl-setting control |
| Browser DevTools (Network/Console) | One page at a time | Yes | Debugging a single page you are on |
| Broken Link Checker (WP plugin) | Whole WordPress site | WordPress only | Always-on monitoring inside admin |
| Manual browser scroll | One page at a time | Yes | Post-migration spot check |
Here is the detail behind the table. The five methods are ranked by how much coverage they give for the time they take. Whole-site scanning beats page-by-page every time, but page-by-page is still useful when you are investigating one specific page.
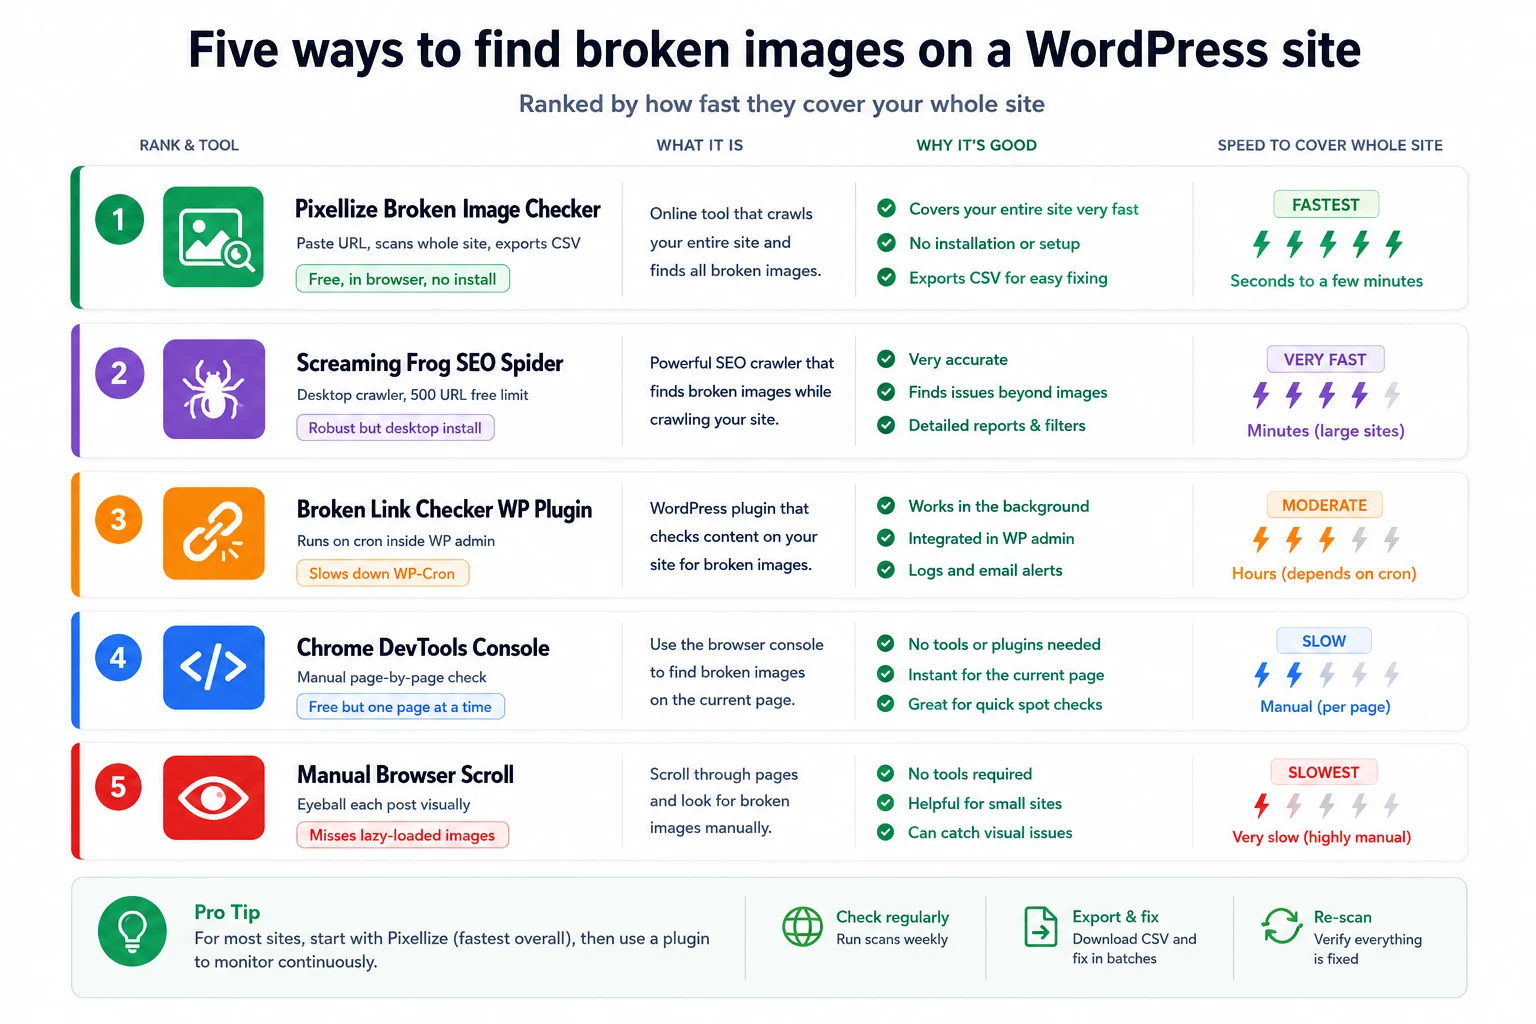
The fastest way to find broken images on a website is a hosted checker. The Pixellize broken image checker takes any URL, crawls up to 100 pages, reads each <img> tag, and runs a HEAD request against every unique image URL. The output is a CSV of every 404 image with its source page, alt text, and HTTP status. No install, no signup. Best for a quick first sweep. Limitation: it crawls public URLs, so it will not reach scheduled or password-protected pages.
Screaming Frog is the SEO standard for crawling a site at scale. The free tier covers 500 URLs, which is enough for most small sites. Set the spider to follow internal links, then under the Images tab, sort by Status Code and filter for 4xx and 5xx. You get a deduplicated list of every broken image URL with its source page. Best for medium sites where you want crawl control. Limitation: it is a desktop install, and the 500 URL cap is tight once you pass a few hundred pages.
The classic WordPress option. The plugin runs as a background task via WP-Cron, scans post content for broken links and images, and surfaces results in the admin dashboard. It catches images embedded in posts but generally misses theme-template images (logo, header) and some plugin-generated markup. Best for small WordPress sites that want permanent monitoring. Limitation: it adds load on every cron tick, and on busy sites with WP-Cron disabled, it never runs.
Open the page in Chrome, hit F12, switch to the Network tab, filter for Img, and reload. Every 404 image shows up in red. Or use the Console with this one-liner:
document.querySelectorAll('img').forEach(i => {
  if (!i.complete || i.naturalWidth === 0) console.log('Broken:', i.src);
});
Best for a single page you are debugging right now. Limitation: it only checks the current page, and it misses images that lazy-load below the fold unless you scroll first.
Open each page and scroll. Easy to dismiss, but on a 20-page site it takes 15 minutes and catches things scripts miss, like an image that loads but is the wrong file (a cat photo where a chart should be). Worth doing once after a migration, even if you also run a crawler.
Yes. Any crawler-based broken image checker works on public URLs with no login. Pixellize, Screaming Frog, and similar tools read a site from the outside, so you can check images on a website you do not own or administer. You only need admin access later, to fix the broken files once the scan has found them.
That outside-in view is also why a broken image checker beats clicking through pages yourself. It sees every page you link to, not just the one you remembered to open, and it flags images that a visitor would hit even if you never do.
On a static site, an image is one file in a folder. Move the file, update the markup, done. On WordPress, the same image is an attachment row in wp_posts, a path in wp_postmeta, a thumbnail set on a post, an entry in the media sitemap, a set of srcset variants, possibly a CDN-rewritten URL, and a target for lazy-load scripts. Any one of those layers can drift and produce a 404 even when the file is still on disk.
That layered model is why a generic broken image checker sometimes misses WordPress-specific failure modes. Three things make WordPress different:
src for data-src, which confuses simple crawlers that only read the rendered src. The Pixellize tool reads data-src too, so it does not false-flag lazy-loaded images.Finding the broken image is half the job. Knowing why it broke decides the fix. Six causes show up over and over on real WordPress sites.
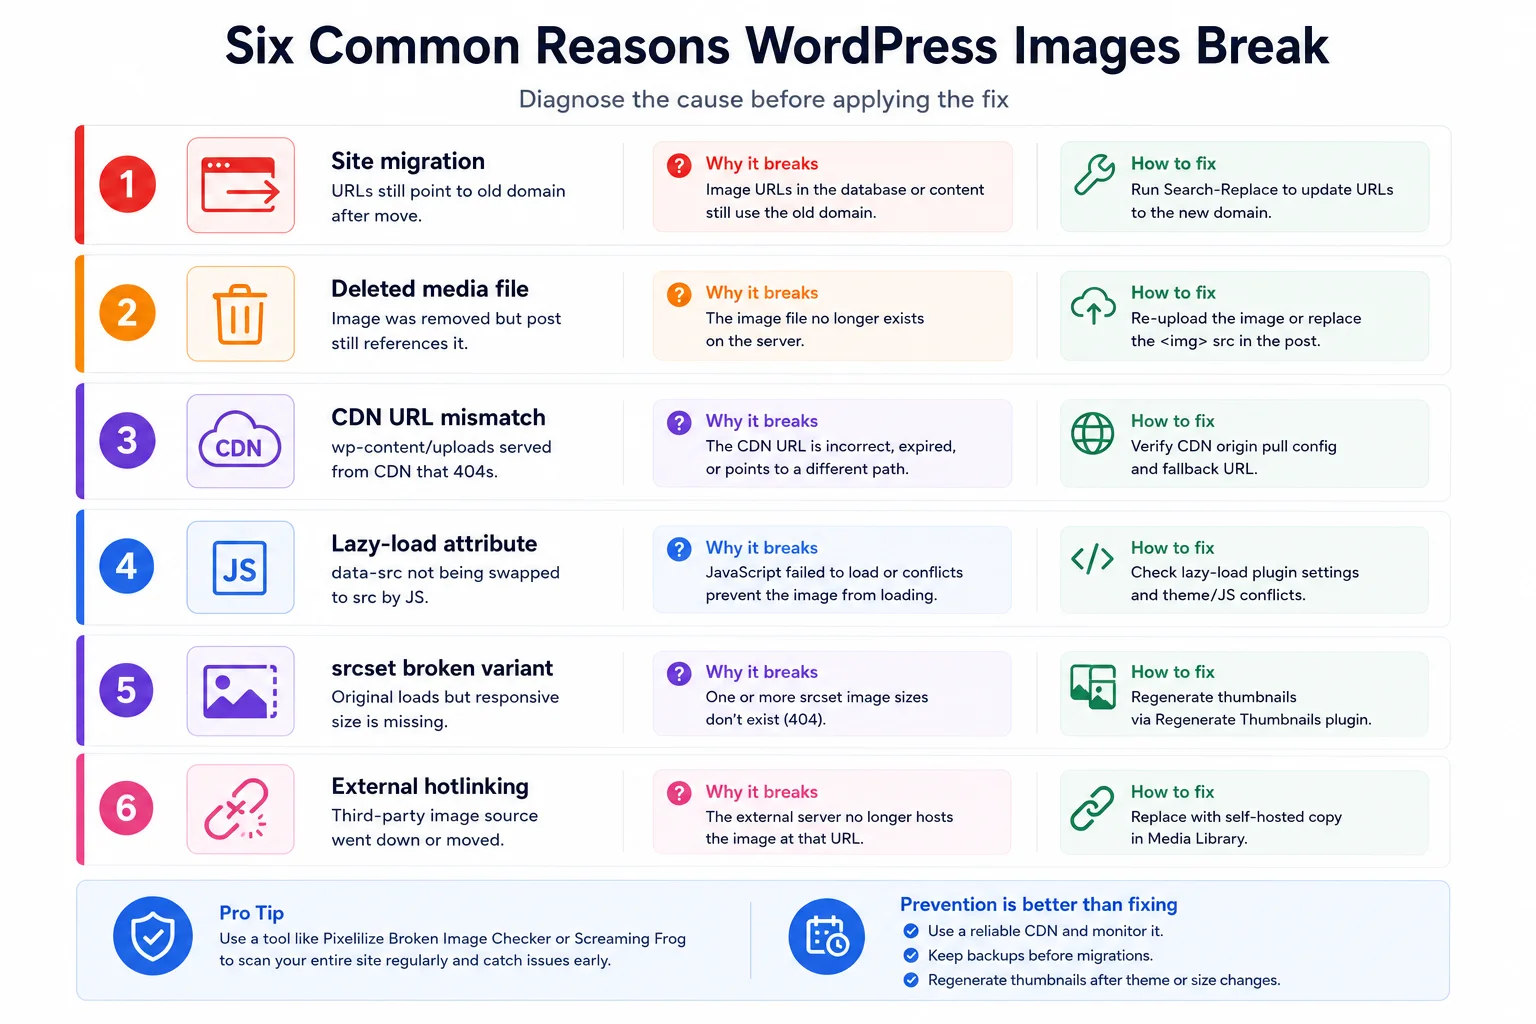
You moved from oldsite.com to newsite.com and ran a search-and-replace, but you forgot one of the variants. Post content still has hardcoded https://oldsite.com/wp-content/uploads/... URLs. The Better Search Replace plugin or a WP-CLI command like wp search-replace handles this in one pass. After running it, also check wp_options.siteurl and wp_options.home.
Someone cleaned up the Media Library and removed a file that was still embedded in three published posts. The <img> src points to a path that no longer exists on disk. Fix: re-upload the original (if you have it), or replace the <img> in each post with a different image.
If you use Cloudflare, BunnyCDN, or a similar service, image URLs get rewritten from /wp-content/uploads/... to cdn.yoursite.com/uploads/.... When the CDN origin-pull config drifts, the rewritten URL works but the underlying file 404s on origin. Test by curling the original WordPress URL directly. If it 200s, the CDN is the problem, not the file.
Lazy-load plugins replace the src attribute with data-src and put a 1px transparent placeholder in the real src. A naive broken image checker sees the placeholder and reports the image as broken. The fix is not to change anything, the image is fine. Use a checker that understands data-src (the Pixellize tool does), or temporarily disable the lazy-load plugin while you audit.
WordPress generates multiple sizes (thumbnail, medium, large, plus theme custom sizes) and lists them in the srcset attribute. If your image_sizes filter changed but old posts still reference the old sizes, the browser picks a variant that no longer exists. Run the Regenerate Thumbnails plugin once to rebuild every size.
An old post embeds <img src="https://someothersite.com/image.jpg"> and that site went offline or removed the image. Self-host every image you embed. If you have hundreds of legacy hotlinks, a plugin like Auto Upload Images can copy external images into your own media library and update the post markup in one pass.
Once you have your list of 404 images on a website, work through them in priority order:
Cleaning up the current backlog is half the job. The other half is preventing the next round. Three habits help:
http://yoursite.com/wp-content reference closes that gap.Broken images do not directly drop your text rankings, but they hurt three other things, which is why Google’s own Google Images guidance leans so hard on reliable image delivery:
For most sites under 5,000 pages, a free hosted broken image checker run once a month, plus a manual eyeball pass on top-traffic pages, covers the work. The Pixellize broken image checker is one option, but the methodology matters more than the specific tool. Pick something that handles lazy-load, exports a CSV, and shows you the source page URL for every broken image.
Sites with 5,000-plus pages, complex CDN setups, or strict SEO compliance needs are where paid options like Screaming Frog or Sitebulb earn their cost. The breakeven is roughly the point where a free tool’s page cap becomes a blocker.
Paste a URL, pick single page or whole site, and get every 404 image with its status code and source page, free and with nothing to install.
Open the Broken Image CheckerIf you have never run a broken image audit, the first pass takes about half an hour: ten minutes to crawl the site with a broken image checker, ten minutes to triage the CSV, ten minutes to fix the top five offenders. Knowing how to find broken images on a website is half the work; doing it on a schedule is what keeps the site clean. Start with a free scan, fix the worst ones, set a monthly reminder, and move on. The payoff, in image search visibility, Core Web Vitals, and reader trust, beats the time it costs.
Related: find all links on a website.
Use the whole-site mode of a broken image checker. Enter the homepage, pick whole website, and the tool crawls internal links up to 100 pages, collects every image, and HEAD-checks each one. You get a single CSV of every 404 across the site, with the source page for each, instead of checking pages one at a time.
Yes. A crawler-based broken image checker reads public URLs from the outside, so it needs no login or admin rights. Pixellize, Screaming Frog, and similar tools work on any site you can open in a browser. You only need admin access later, to fix the broken files the scan reports.
Usually one of three reasons: the image is hotlinked from a CDN that blocks the checker user agent, it uses lazy-load with data-src and the checker only read src, or JavaScript injects it after load so it is not in the static HTML. Load the reported URL directly and watch the network tab to confirm.
Monthly for a site that publishes weekly, quarterly for one that posts a few times a month. Always run a full scan after a migration, a redesign, a CDN change, or a bulk media cleanup, because those are the moments images break in large numbers. Saving each month CSV lets you diff the lists.
Yes, in two ways. Image 404s hurt Google Images ranking and crawl efficiency for those URLs. At the page level, a high broken-image ratio is a soft quality signal that can affect regular search, especially for image-dependent pages like recipes, product listings, and photo galleries.
A broken image is an img whose source file returns a 404 or fails to load, shown as a gray placeholder. A broken image link is a hyperlink that points to an image URL that no longer resolves. A broken image checker finds the first; a broken link checker finds the second. Run both for a clean audit.
Slightly but measurably. Every 404 still costs a network round-trip and triggers a layout shift when the broken icon swaps in. On a page with five broken images, that is roughly 200 to 500 ms of wasted load time plus a CLS hit. Fixing them tightens both LCP and CLS, especially on slow mobile connections.
Founder and CEO of Pixellize.io, building AI-powered web tools and digital products with a focus on user experience and automation. M.Sc. Zoology, working at the intersection of technology, data analytics, and life sciences.