
How to Unzip Files Online (No Software Needed)
You download a .zip, double-click it, and nothing useful happens. Maybe it opens a locked preview you cannot edit, or the work…
Read article
You have a Word file packed with charts and photos, and you need those images as separate files. Copying each one and pasting it into an image editor works, but it quietly drops the quality and takes forever for a long report. Knowing how to extract images from a Word document the right way gets you every picture at full quality in seconds. This guide covers four methods, from a clever file-rename trick to the free Pixellize DOCX Image Extractor, so you can pick the one that fits your setup.
The fastest way to extract images from a Word document is to open the .docx with an extractor and download all pictures as a ZIP. A .docx is really a zip archive, so the images already sit inside it at full quality. Pixellize pulls all of them in one click, with no upload.
Here is the thing most people miss: a modern Word file is not one solid blob. It is a compressed folder of parts, and your pictures live in a folder called word/media exactly as they were inserted. Every method below is just a different way of reaching into that folder.
This is the no-software trick, and it works on any computer. Make a copy of your document first so you do not disturb the original, then change the copy’s extension from .docx to .zip. Open the zip, go into the word/media folder, and there are all your images.
.docx with .zip. On Windows you may need to turn on file extensions first.word/media to find every image.Keep in mind the names inside that folder are not friendly. You will see image1.png, image2.jpeg, and so on, in the order Word stored them, not the order they appear on the page. It works, but you do the sorting and renaming yourself. For a three-image flyer that is fine. For a fifty-page manual, hand-sorting dozens of files by trial and error gets old fast, which is exactly where a preview-based tool earns its keep.
If you would rather see the pictures before you save them, an online extractor is the cleaner route. Drop your .docx onto the Pixellize DOCX Image Extractor and it shows every image as a thumbnail with its name, format, size, and dimensions. Save one picture, or grab all of them as a ZIP.
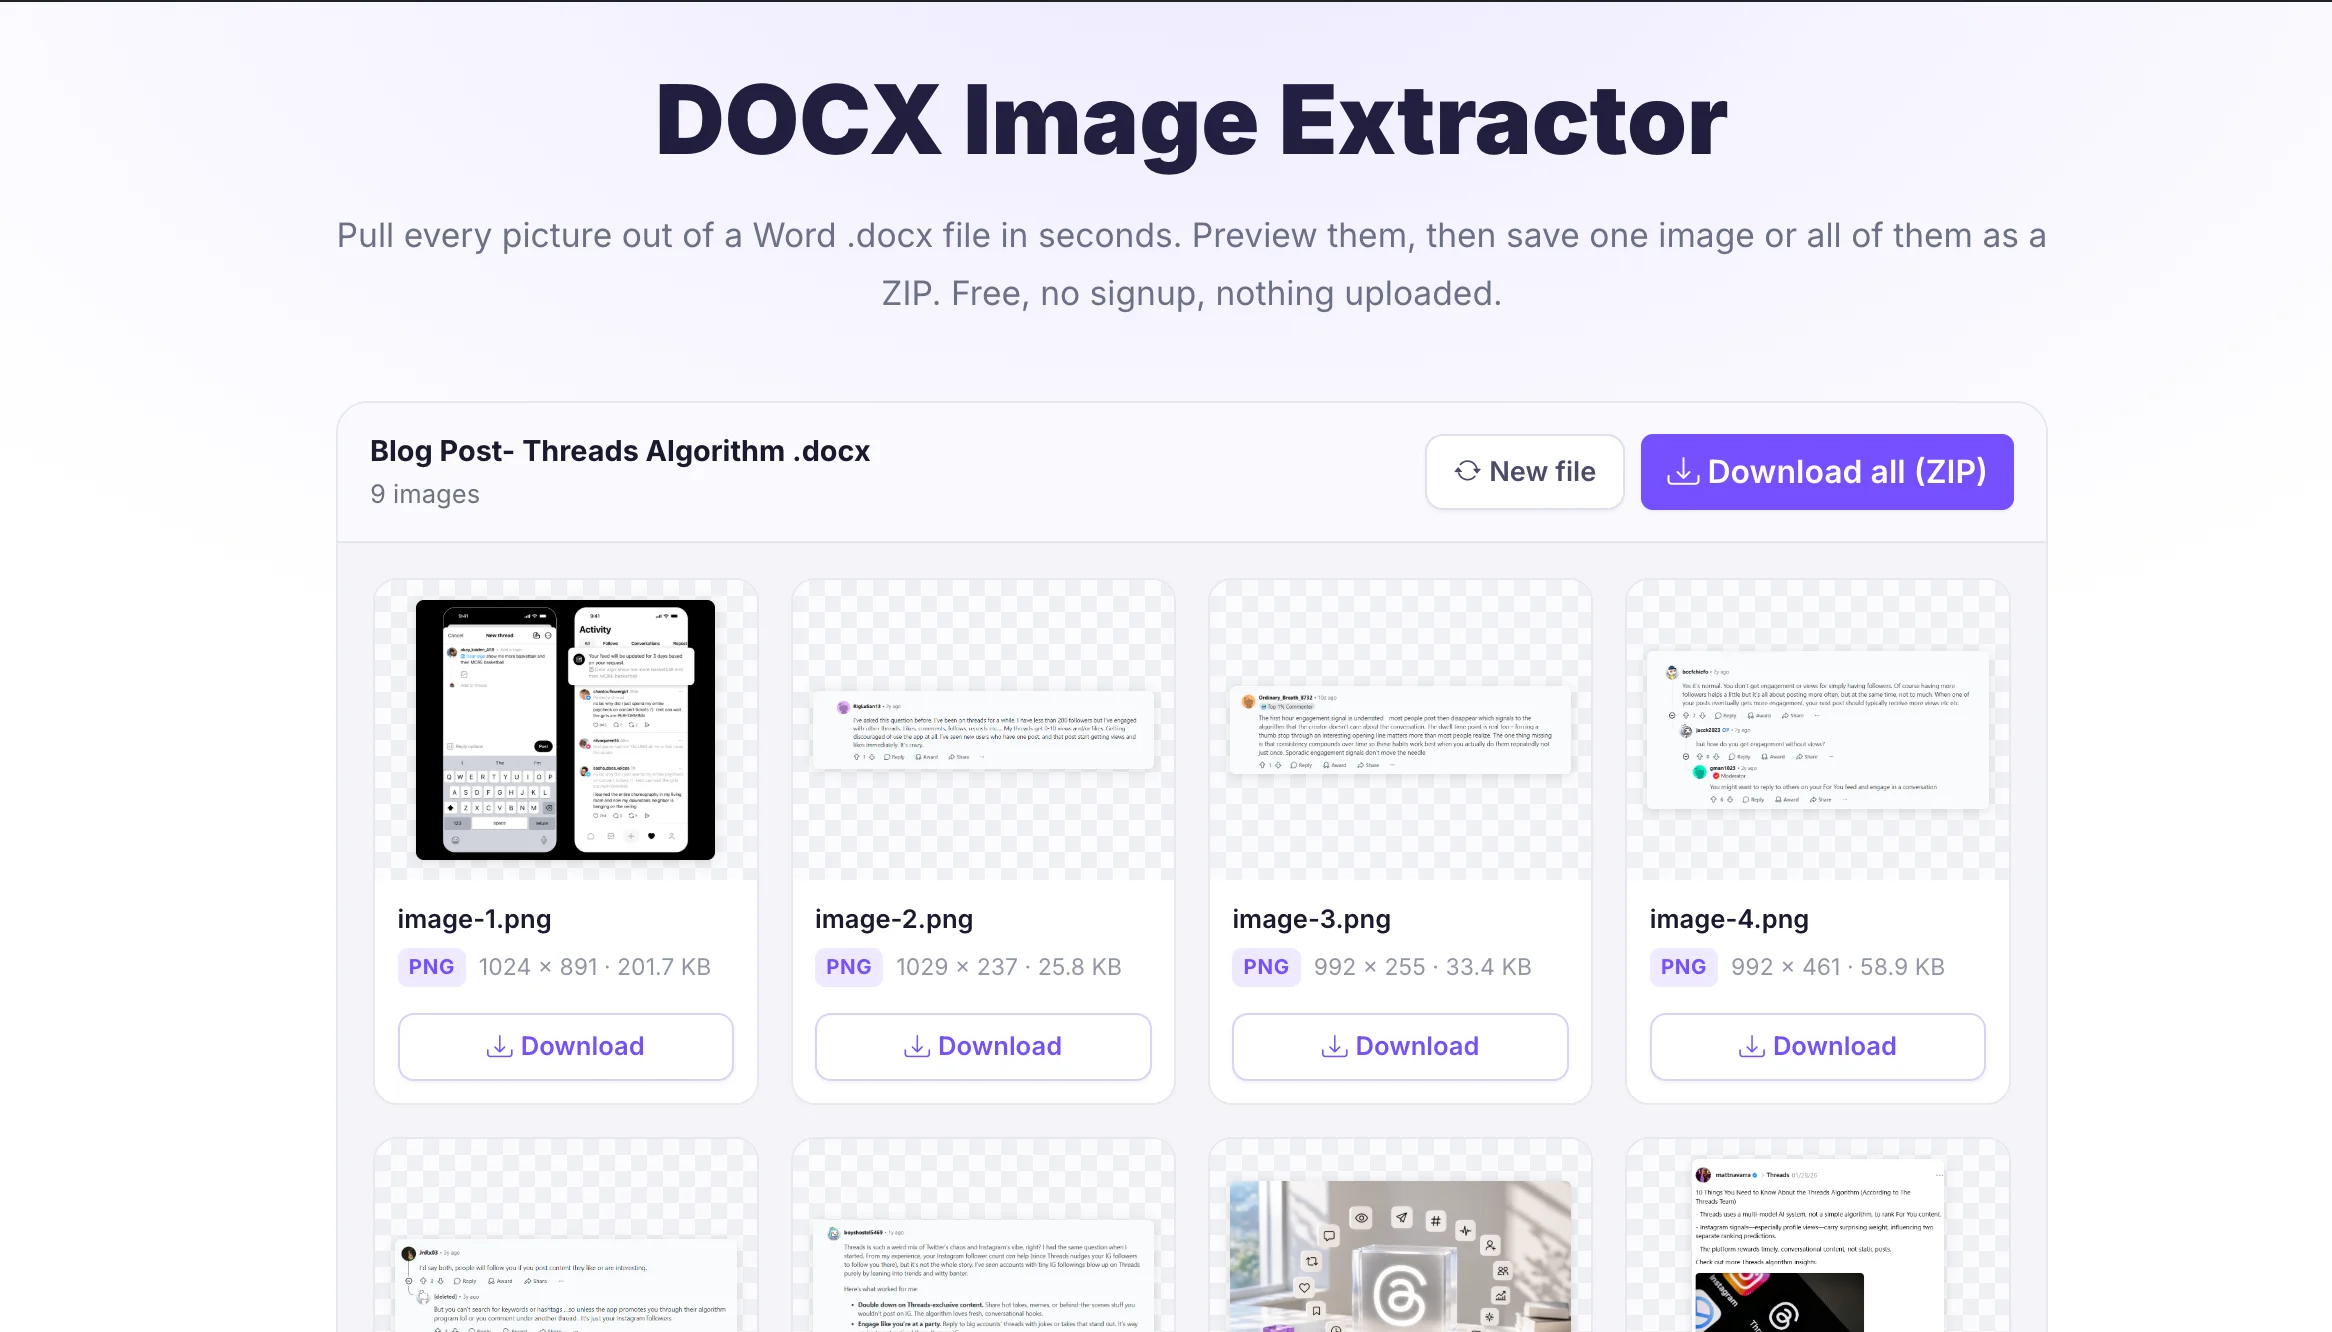
The advantage over the rename trick is the preview, so you are not guessing which file is which. It also runs entirely in your browser. Pixellize reads the document on your device, so a confidential contract or an unreleased deck never leaves your computer. That makes it a safe pick for work files.
If you already have Word open, the Save as Web Page option does the export for you. Go to File, then Save As, choose Web Page (.htm) as the type, and save. Word creates an HTML file plus a companion folder named after your document, and that folder holds every image. Microsoft documents this approach in its own support article.
One catch worth knowing: Web Page mode sometimes saves two copies of each image, a full-size one and a smaller web-optimized one. You will need to pick the full-size files and ignore the duplicates. The Windows Club covers the same method with screenshots if you want a visual walkthrough.
Only need a single image? Skip the bulk methods. In Word, right-click the picture and choose Save as Picture, pick a folder and format, and you are done. It is the most intuitive option when you want one or two graphics, and it needs zero technical know-how.
The downside shows up at scale. Doing this for forty figures in a research paper is slow and error-prone, and right-clicking can re-encode the image depending on the format you choose. For more than a handful, one of the bulk methods saves real time.
Each method has a sweet spot, and together they cover how to extract images from a Word document on any device, with or without Office installed. The table below lines them up so you can match the job to the tool.
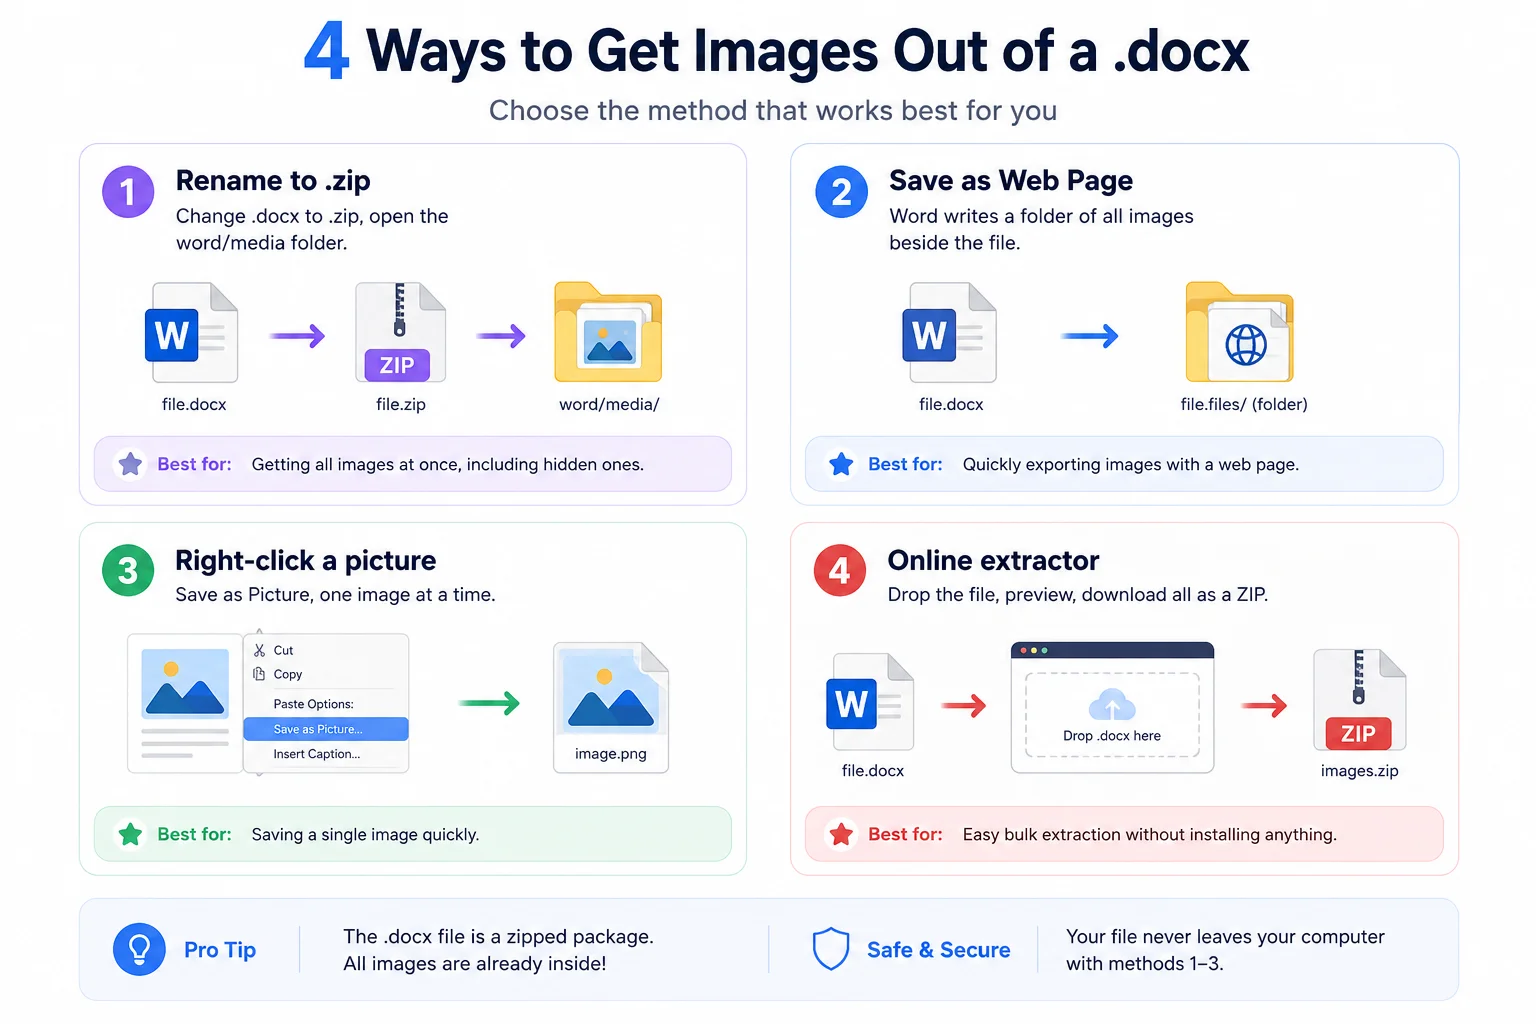
| Method | Needs Word? | Best for | Preview? |
|---|---|---|---|
| Rename to .zip | No | Quick grab, any computer | No |
| Pixellize online extractor | No | Bulk, with a preview, private files | Yes |
| Save as Web Page | Yes | You already have Word open | No |
| Right-click Save as Picture | Yes | One or two images | Yes |
For most people the online extractor wins because it is fast, shows a preview, and works without Word, which matters on a Mac or a Chromebook. When you also need those pictures in a single file, Pixellize has a PDF image extractor and an images to PDF tool in the same toolkit.
Extracting images from Word does not lower quality when you pull the original files out of the .docx. The pictures are stored exactly as inserted, so the zip trick and a proper extractor keep them untouched. Quality only drops when you copy and paste into another app, which re-encodes the image.
This is the real reason to avoid the copy-paste habit. Pixellize keeps the original quality intact with no recompression, so a 300 DPI chart stays a 300 DPI chart. If pixel-for-pixel accuracy matters, like print artwork or screenshots with fine text, reach for a method that touches the source file directly. Both the zip trick and the Pixellize extractor do exactly that, which is why they are the safe choices for high-resolution print and design work.
Now that you know how to extract images from a Word document, the choice is simple. For one image, right-click and save. For everything at once, skip the manual sorting and let a tool do it. The Pixellize DOCX Image Extractor is free, previews every picture, keeps full quality, and never uploads your file, so it handles the whole job in a couple of clicks. Drop your next .docx in and see how quick it is.
The quickest way is to open the .docx in an online extractor and click Download all as a ZIP. The Pixellize DOCX Image Extractor shows every embedded picture as a thumbnail, then bundles them into one zip file. You can also rename the .docx to .zip and copy everything out of the word/media folder by hand.
Yes. You do not need Word at all. Rename the .docx to .zip and open the word/media folder, or drop the file into a browser-based extractor like Pixellize. Both read the images straight from the file, which is why they work on a Mac, a Chromebook, or any device without Office installed.
The most common reason is the file is an old .doc, not a .docx. The legacy .doc format is binary, not a zip package, so there is no word/media folder to open. Save the file as .docx in Word or a free converter first. If images still do not appear, they may be linked rather than embedded.
No, not if you pull the original files out of the document. Images inside a .docx are stored exactly as they were inserted, so the zip method and a proper extractor keep them at full quality with no recompression. Quality only drops when you copy and paste a picture into another program, which re-encodes it.
Convert it to the modern format first. Open the .doc in Word and use Save As to choose Word Document (.docx), or run it through a free online converter. Once it is a .docx, you can rename it to .zip or use an online extractor to pull the images, since the new format stores them in a readable folder.
Embedded images live in a folder called word/media inside the .docx package. Because a .docx is really a zip archive, you can browse to that folder by changing the extension to .zip and opening it. The pictures are named image1, image2, and so on, in the order Word saved them, not the order on the page.

Founder and CEO of Pixellize.io, building AI-powered web tools and digital products with a focus on user experience and automation. M.Sc. Zoology, working at the intersection of technology, data analytics, and life sciences.