
How to Download Instagram Profile Picture Full Size (HD)
Tap someone's Instagram profile picture and Instagram gives you a tiny circle, sometimes not even a full view. There is no built-in…
Read articleLearn how to blur photo background on any image, free and in your browser. Pick the right blur amount, fix rough edges, and download in seconds with Pixellize.

Open any phone or social app today and the same look is everywhere. The person stays razor sharp while the room behind them melts into a soft, creamy blur. It reads as expensive. It reads as edited. The good news: you can blur photo background on any picture without a fancy camera, a subscription, or any software on your machine. Any photo, any face, right inside your browser.
This is the updated 2026 guide. It walks through the why and the how in plain language, with no jargon and nothing to install. By the end you will be able to take a portrait you already have and give it a clean, professional background blur in about thirty seconds, then fix the two or three things that usually go wrong on the first try.
The short version: a blurred background tells the viewer where to look. The person is sharp, everything else is soft, and your eye has nowhere else to land except the face.
Real cameras with big lenses do this on their own. They blur the background because of how light bends through the glass. Phones started copying the effect in software a few years ago and called it Portrait Mode. Now the same trick is built into almost every photo app you own.
People reach for the effect for a handful of common reasons:
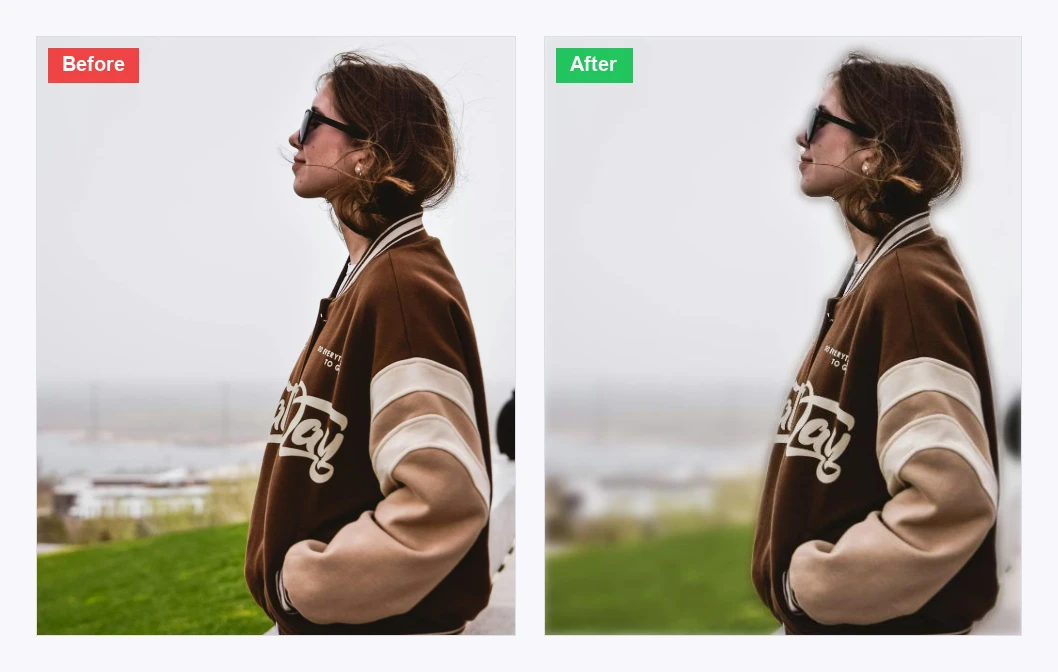
When photographers talk about a blurred background, they usually use the word bokeh. It is a Japanese word for the soft, out-of-focus part of an image. The face stays crisp. The background turns into a wash of color and shape.
On a real camera this happens because of how the lens focuses light. An editing tool fakes the same effect in two steps. First it works out where the person ends and the background begins. Then it leaves the person alone and softens everything else.
The clever part is that first step. The tool has to draw an invisible outline around the subject, even around tricky bits like flyaway hair and earrings. Modern tools do this in under a second, right on your device.
If the photo is brand new, you can ask your camera to do the blur the moment you take the shot. iPhones call this Portrait Mode and Android phones use similar names. The phone measures depth as you shoot and applies the blur in real time.
If the photo is older, or it was not taken in Portrait Mode, you can still get the same look after the fact. You open the photo in an online tool, the tool finds the person, and it blurs everything else. That is what this guide focuses on, because it works on any photo you already own.
| Method | Best for | Works on old photos? | Cost |
|---|---|---|---|
| Phone Portrait Mode | New photos on a recent phone | No, only at capture time | Free, needs a dual-camera phone |
| Pixellize Blur Image Background | Any photo you already have | Yes | Free, in your browser |
| Desktop editor like Photoshop | Full manual control | Yes | Paid subscription |
The Pixellize Blur Image Background tool is built for this one job. It is free, it runs in your browser, and your photo never leaves your device. Here is the full flow:
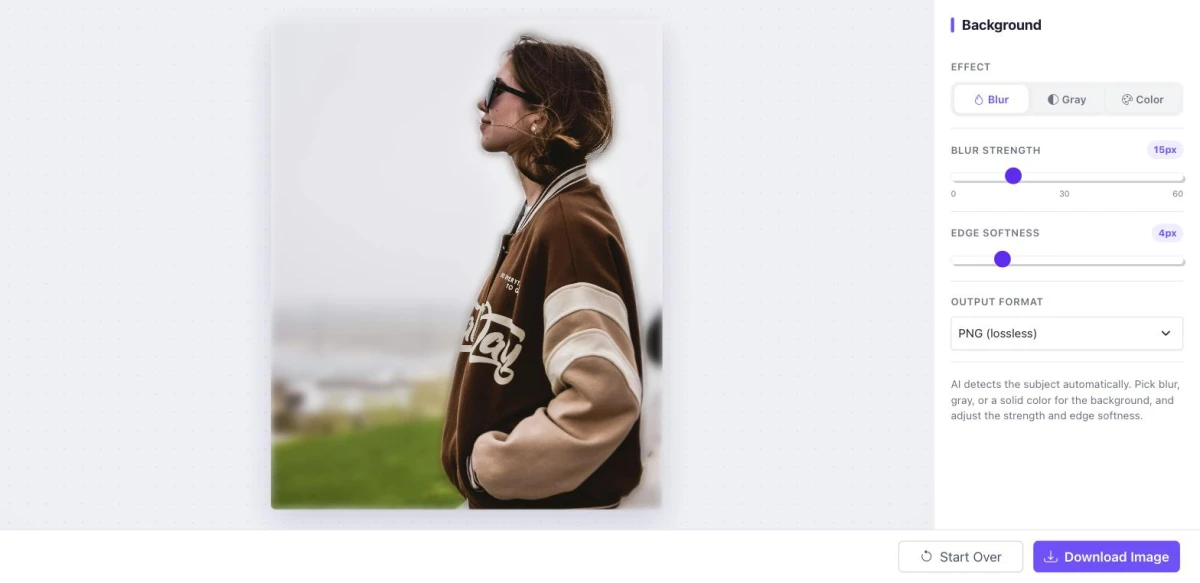
That is the whole process. No account, no email, no paid plan. If you do not like the result, move the slider and download again.
The right amount of blur is usually medium. A medium blur turns the background into soft shapes and color while the face stays the clear focus, and it hides small detection mistakes. Use light blur when the setting adds useful context, and save heavy blur for photos where the cutout around the hair is already clean.
This is the setting people get wrong most often, so it is worth a moment. Blur strength is not a “more is better” slider. Think of it in three rough zones:
When in doubt, pick medium. It flatters almost every portrait and forgives the most mistakes.
A blur tool can only do so much with the photo you give it. A few small choices when you take the original shot lead to a much better result.
If the first attempt looks rough, run the same photo again with a slightly lower blur strength. A softer blur hides small detection mistakes better than a heavy one.
It is fair to be honest about what these tools cannot do well yet. Background blur works best on a single person facing the camera in clear light. Here is where it struggles:
In any of those cases the result is not bad, just imperfect on the edges. A lighter blur amount usually saves it.
Most first-try problems come down to three things, and each has a fast fix:
People ask whether this is worth doing for everyday photos or only for serious work. Here are the cases where the small effort really pays off:
It is safe when the tool works on your device instead of a server. The Pixellize Blur Image Background tool processes your photo entirely inside your browser tab, so the image is never uploaded and nothing is stored. Close the tab and no copy is left behind, which matters most for photos of you or your family.
Most photo tools online ask you to upload your image to their servers. That can feel uncomfortable, especially when the photo is of you, your children, or anyone you care about. Once a file leaves your device, you rarely know where it lives or how long it is kept.
Pixellize works differently. The Blur Image Background tool runs entirely inside your browser tab. The photo is processed on your own phone or computer and is never sent to a server. Close the tab and nothing is left behind. No account, no upload, no hidden storage.
Upload a photo, drag the slider, and download. It all runs in your browser with nothing uploaded.
Now you know how to blur photo background on any image, free and in seconds. Background blur is one of those small edits that quietly takes a regular photo and makes it feel like it was taken on purpose. You do not need a new phone, a paid app, or any technical skill. Open the free Pixellize Blur Image Background tool and try it on a photo you already have. If the first result is not quite right, drop the blur strength a bit and try again.
Before you post the result, you may want to compress the image to a smaller KB size so it loads fast.
Once your background is clean, learn how to add a watermark to your photos so your edits keep your credit.
To hide a person instead of just softening the backdrop, see how to pixelate a face in a photo before you post it.
Once the edit is done, it is worth learning how to remove the photo’s hidden metadata before you post it.
Yes. There is no sign-up, no trial, and no paid plan. You can blur as many photos as you want.
No. The tool runs entirely in your browser. The photo never leaves your device, and nothing is stored on any server.
Yes. You can open the tool on any modern phone browser. The download saves straight to your phone gallery.
Most everyday phone photos work fine. Very large images may take a few extra seconds to process. The tool keeps the original resolution.
Yes. You own the photo and the edited version. There are no watermarks on the result.
Hair is the hardest part to detect. A lower blur strength usually fixes it. Photos with good light and clear contrast between hair and background give cleaner results.
It works best on photos with a single person. With multiple people, the tool usually keeps only the closest person sharp.
Founder and CEO of Pixellize.io, building AI-powered web tools and digital products with a focus on user experience and automation. M.Sc. Zoology, working at the intersection of technology, data analytics, and life sciences.